
Table of Contents:
Learn how to set up a VPN connection for Oculus Quest 2 on Windows 10 for secure access to the Meta Oculus Store.
There are several ways to configure your Oculus Quest 2 to work over a VPN connection. The most practical of these is to create a mobile hotspot in Windows 10. The idea behind this method is to use the VPN app you use on your PC to connect your Quest headset to it.
To use this method, two conditions must be met:
- You should already have a VPN connection on your PC.
- A Wi-Fi module must be installed on a Windows 10 PC.
Setting up the mobile point itself will not be difficult. Let’s look at how to do this point by point.
Enable Mobile Hotspot in Windows 10
1. In the lower left corner, click on the Windows icon (Start button), then select Settings (gear icon) and in the window that opens, click Network and Internet.
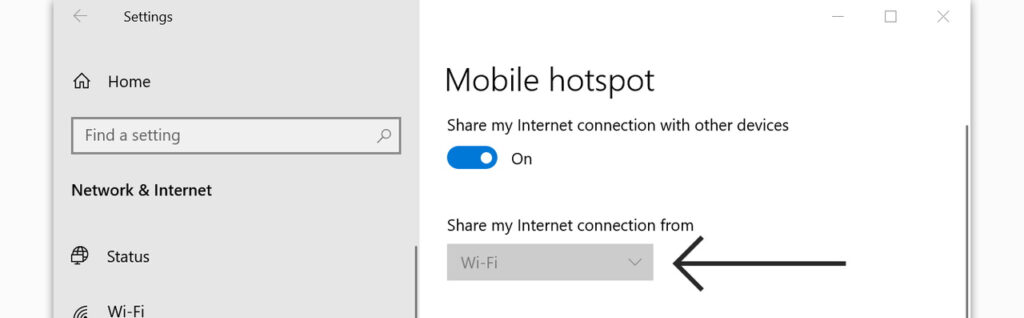
2. In the window that opens, select Mobile Hotspot and turn it on.

3. Under Share my Internet connection, select Wi-Fi.
4. Set a new network name and password for the mobile hotspot. Using this network name and password, you will connect Oculus Quest to the mobile Hotspot.
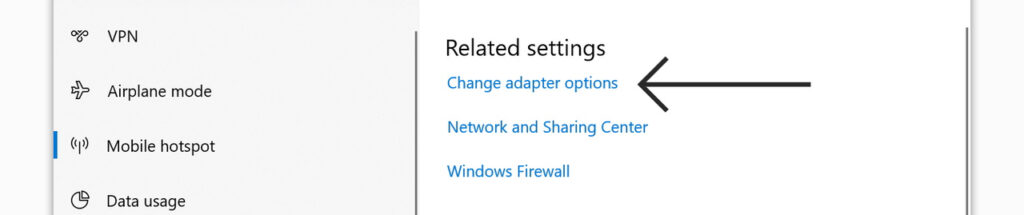
5. In the Advanced settings section, click Change adapter settings.
6. In the Network Connections window, you will see a network called Local Area Connection with a serial number. This is the new mobile hotspot you just created. The name of this connection will be useful to you in the next step.
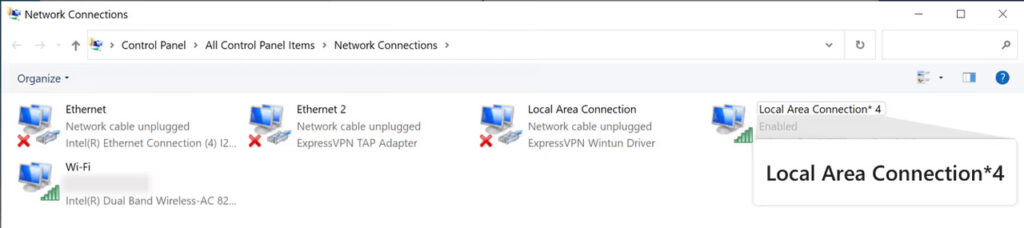
7. Now you need to select the connection that your VPN provider created. This connection is usually named the same as the VPN app you are using.
8. Right-click on this connection and select Properties.

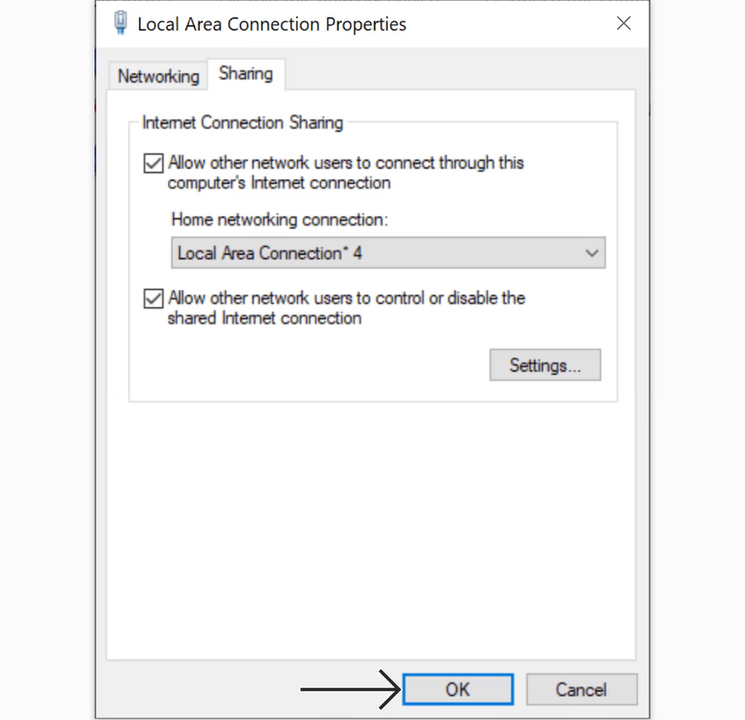
9. Open the Sharing tab.

10. Check the box next to Allow other network users to use this computer’s Internet connection.
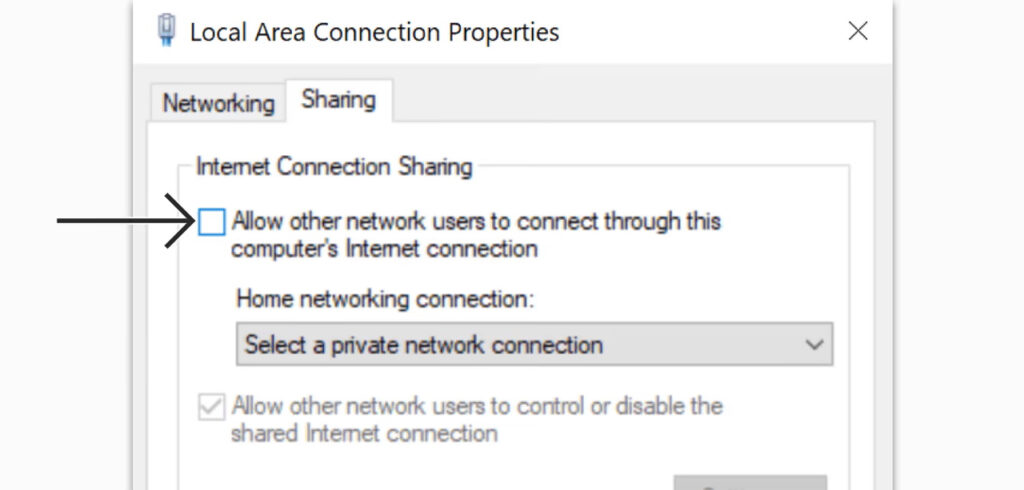
11. In the list of connections that need to be shared that appears, select the one that was created when you turned on the mobile hotspot. Click OK.
Everything is ready to use VPN in Oculus Quest via Windows 10
At this point, the setup is complete and, if everything is done correctly, the mobile hotspot will now share your Internet to Oculus Quest with your Windous PC along with the VPN. Next, you just need to connect your Quest to this connection as if it were a regular Wi-Fi connection.
The convenience of this method is that you can activate the VPN connection only when you need it.
Do you know other methods to connect Oculus Quest 2 to VPN? Share your experience in the comments. In this way you will help other owners of this virtual reality headset.