
Table of Contents:
There are several ways to take a screenshot in Oculus Quest VR. One of them is obvious. The second is little known but much more convenient.
While using Oculus Quest, it is often necessary to capture what is displayed on the headset’s screen. Share your record with friends, save the screen with settings for the future or compare the quality of graphics when experimenting with different parameters. In all these cases, we need to create a screenshot.
First way. Oculus Quick Menu
The first and most obvious way to take a screenshot is to use the Oculus quick menu. To do this, do the following:
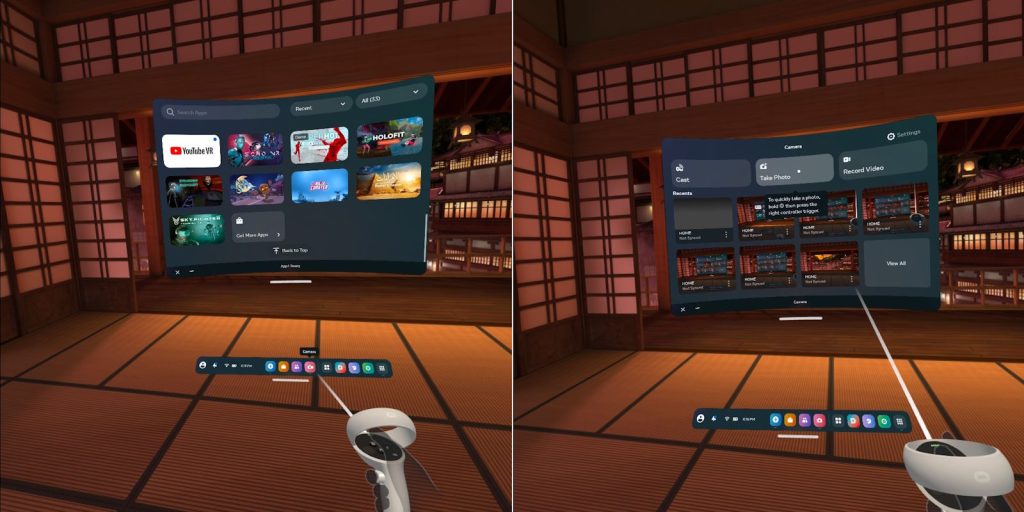
- In any app already running, press the Oculus system key on the right controller.
- Click the Camera icon.
- Above the window that appears, you will see buttons for capturing a video, a screenshot, and other options.
- Click Take Photo and after a few seconds a screenshot will be taken of what your helmet display is currently showing.
- To get only the desired image on the screenshot, without the Oculus system menu – after clicking Take Photo, immediately press the Oculus system key on the right controller again.
The second way. Non-obvious and much more convenient
Oculus Quest has a set of combinations on the controllers, by completing which you activate certain functions of the headset. Such combinations are not described in the official manual for unknown reasons, and taking a screenshot is one of these “hidden” features.
What should be done:
- At any time, press the Oculus system key on the right controller and without releasing it, press the right trigger.
- If you did everything right, a sound notification and a system message about the saved screenshot will appear.
- You need to have time to click on the trigger before the long hold function of the Oculus key is activated (in most cases, this resets the center of the screen). It may not work the first time, but it will be easier to do later and will be a very convenient way to take a screenshot.
Screenshots will be saved in the internal memory of the headset, in the Oculus\Screenshots folder
Note: if you are using Virtual Desktop, then by activating the Copy screenshots to desktop setting, the snapshots taken will be duplicated immediately on the desktop of your PC.