
Table of Contents:
If you are not satisfied with the standard location of Oculus Rift games on HDD, you can move them to another location using our instructions.
How do I save my Oculus VR games elsewhere?
Let’s say your solid-state drive (SSD) where Windows is installed doesn’t have enough space for all the Oculus Rift games you want to download. This is problem! Fortunately, in addition to the SSD, you have a hard disk drive (HDD) installed in your system, which has plenty of space. We will tell you how to change the disk for installing games and transfer the game library in this article.
There is no official way to transfer your games, but you can either transfer everything yourself and create a symbolic link, or use vrBackupper to do this. Let’s consider both methods in more detail.
How do I manually move my Oculus Rift games library to another drive?
This method is completely “manual” – the user needs to do everything on his own, including creating a symbolic link on the command line. If you don’t like this method – it seems too complicated, try moving your game library using vrBackupper.
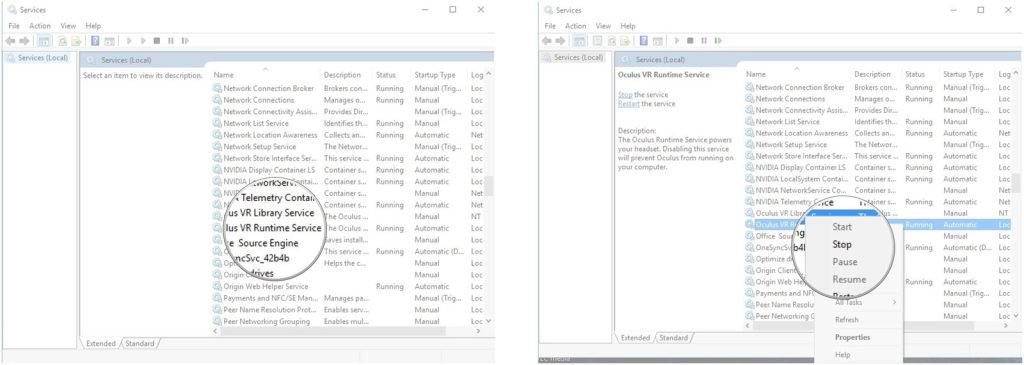
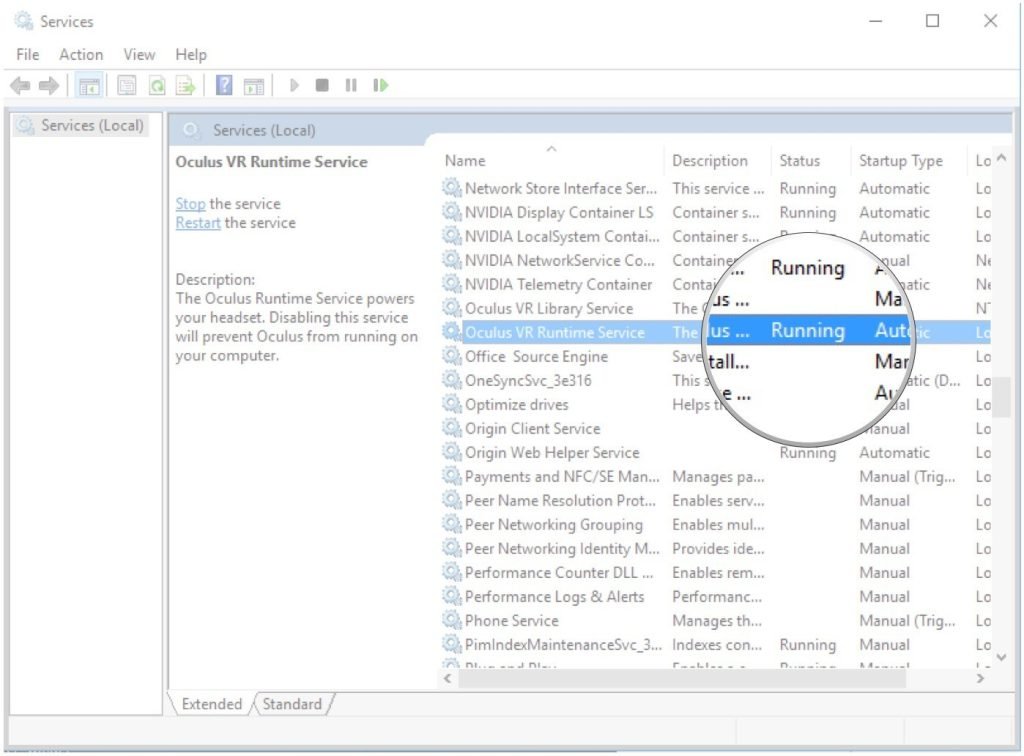
Stop the Oculus VR Runtime service.
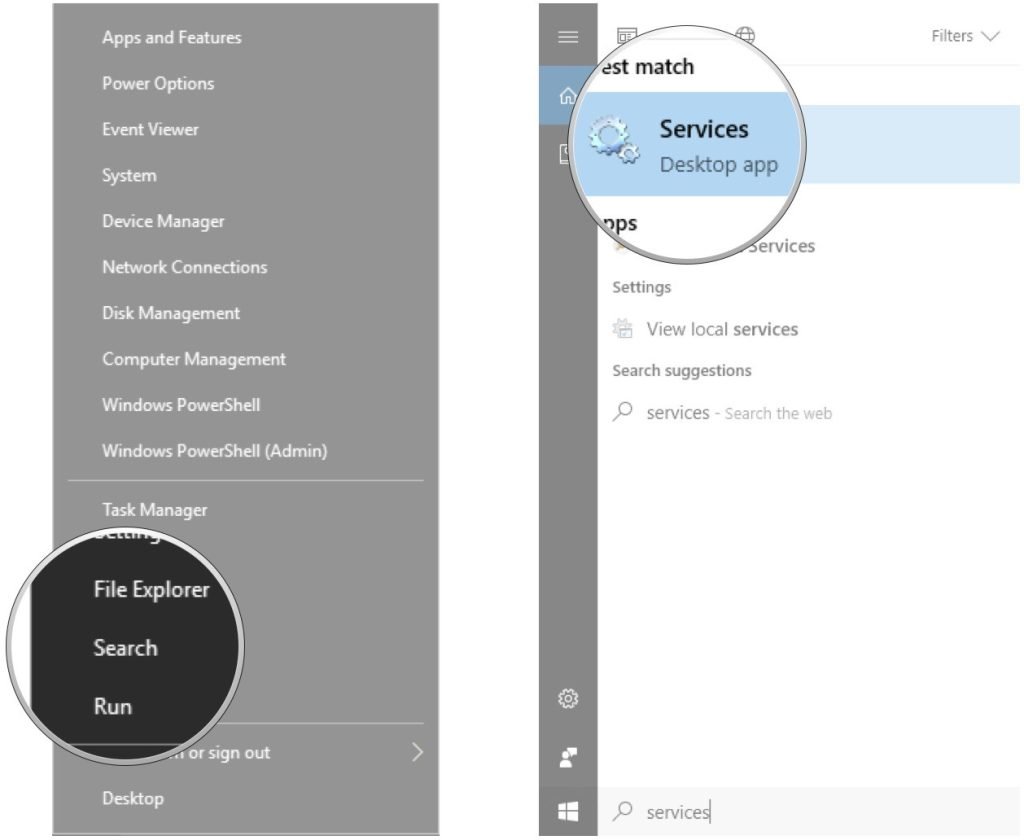
- Right-click the Start button;
- Click Search;
- Type “services” and press Enter on your keyboard:
- Right click Oculus VR Runtime Service (you may have to scroll down a bit to find it);
- Click Stop.
We will run it again later.
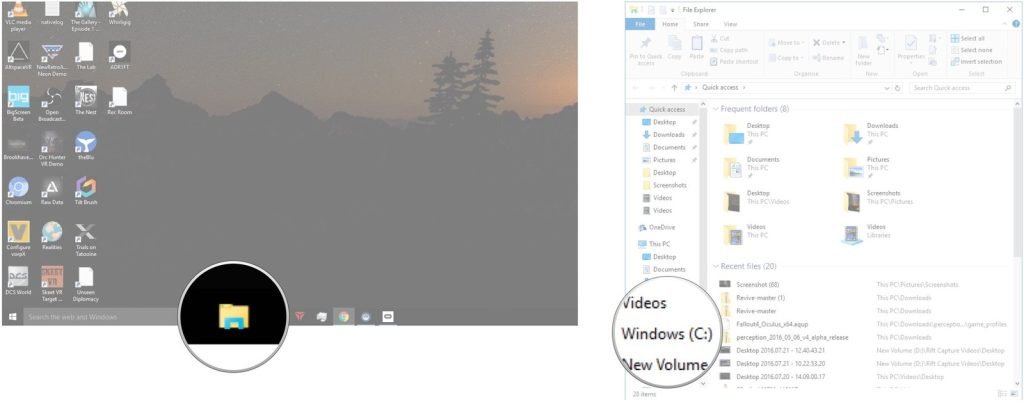
Create a new directory on another hard drive.
- Click the “Explorer” button on the taskbar;
- Select the desired drive. In this case, it’s the new volume (D:);

- Right click in the window;
- Hover your mouse pointer over New and click the Folder button;
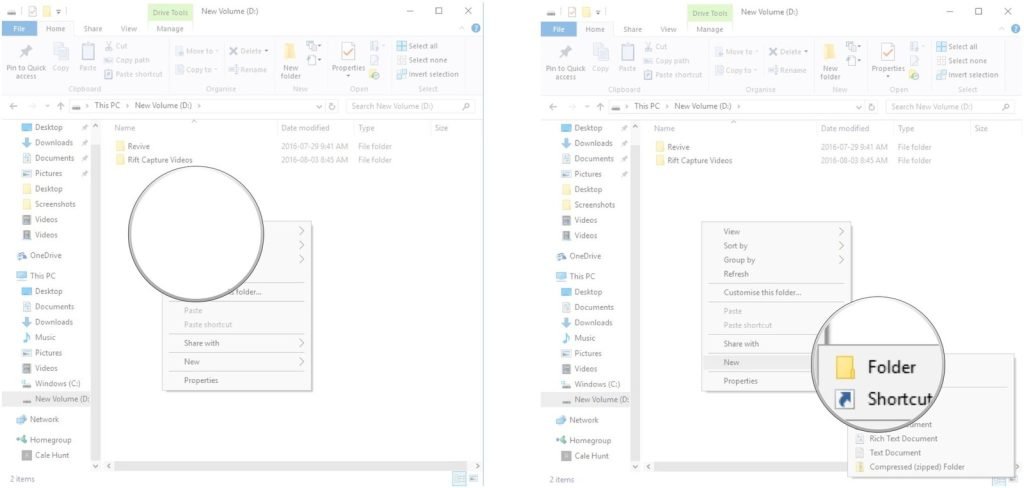
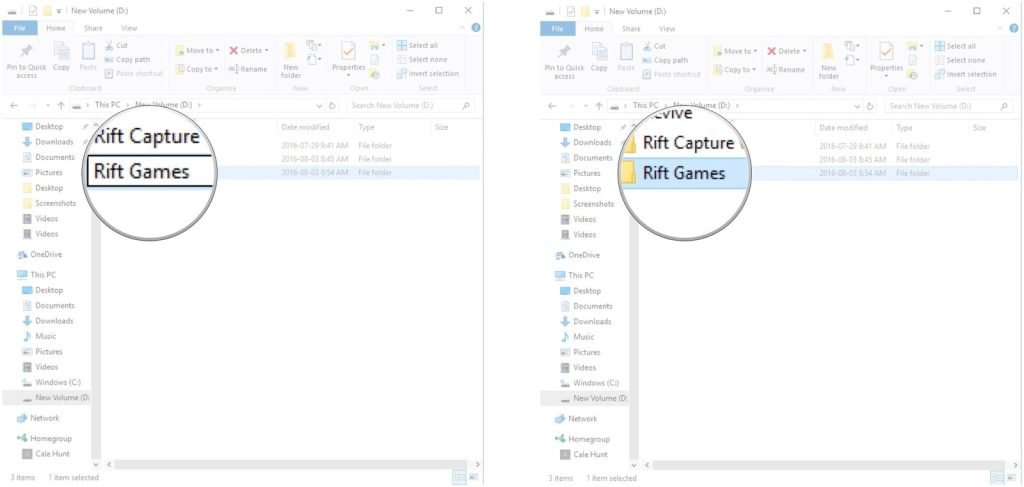
- Enter a name for the folder and press Enter on your keyboard. In this case, we named the folder Rift Games;
- Double click Rift Games to open it.
Keep this window and folder open – you’ll need them in a few minutes.
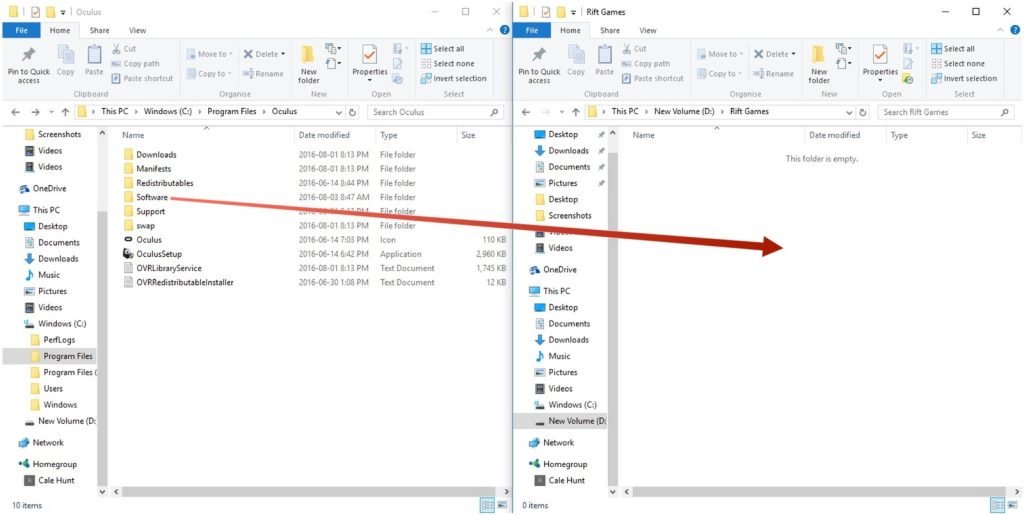
Transfer your existing games to another drive.
- Click the “Explorer” button on the taskbar;
- Select Windows (C:);
- Double click Program Files;
- Double click Oculus. In this folder, you should see another folder labeled Software;
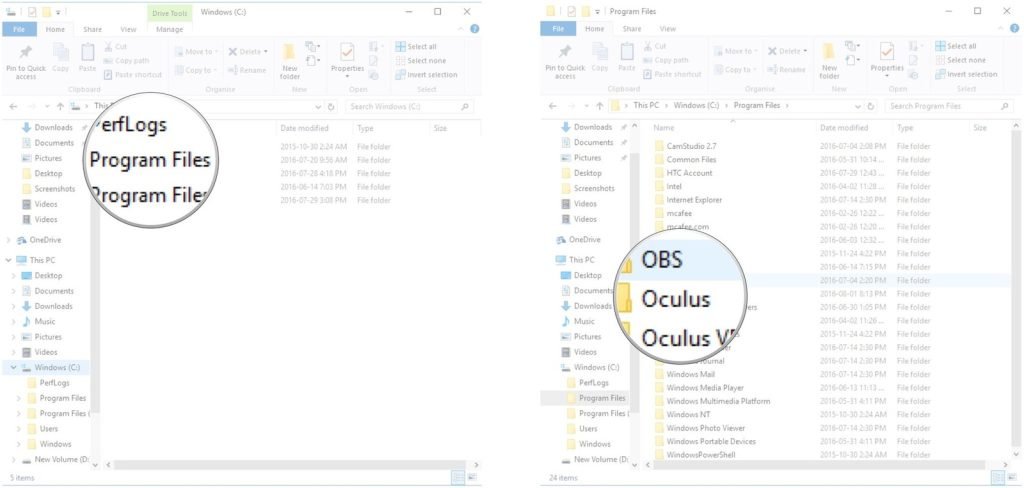
- Click and drag the Software folder into the Rift Games folder you just created. Depending on how many games you have, the transfer may take a few minutes.
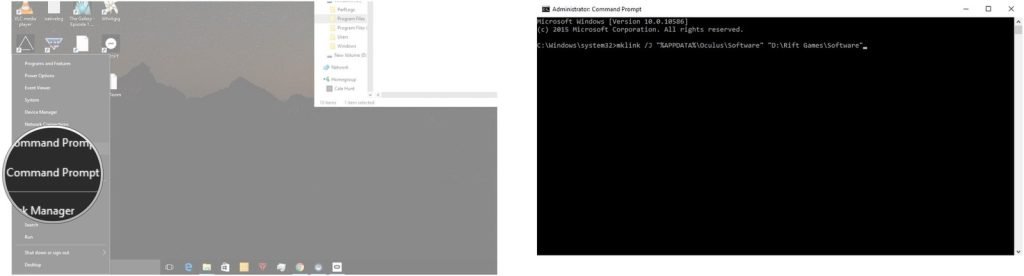
Create a symbolic link between the old folder and the new folder.
- Right-click the Start button;
- Select Command Prompt (Admin);
- Type mklink /J “%APPDATA%\Oculus\Software” “D:\Rift Games\Software” and press Enter on your keyboard. You should receive a message that the connection has been created. Keep in mind that the code you enter may differ from what we have here, depending on how you name your folders and drives.
Free up some space.
Before deleting games from the original directory, make sure they are properly transferred to the new directory. If you’re sure your games are safe and sound in the new directory, you can go ahead and delete the files in the original software folder located at C:\Program Files\Oculus.
Note: Do not delete the software folder itself – it is required for everything to work.
Start the Oculus VR Runtime service.
The Oculus VR Runtime service should be set to start automatically when you restart your computer, but we’ll run a test to make sure it starts.
- Restart your computer;
- Right-click the Start button;
- Click Search;
- Type “services” and press Enter on your keyboard.

- Check Oculus VR Runtime Service to see if it’s working. If it doesn’t, right-click and select Run.
How to automatically move your Oculus games library to another drive.
AOMEI has developed excellent free software that will do everything for you. If you don’t want to manually transfer files to another drive, you can simply download the vrBackupper program and let it do everything for you.
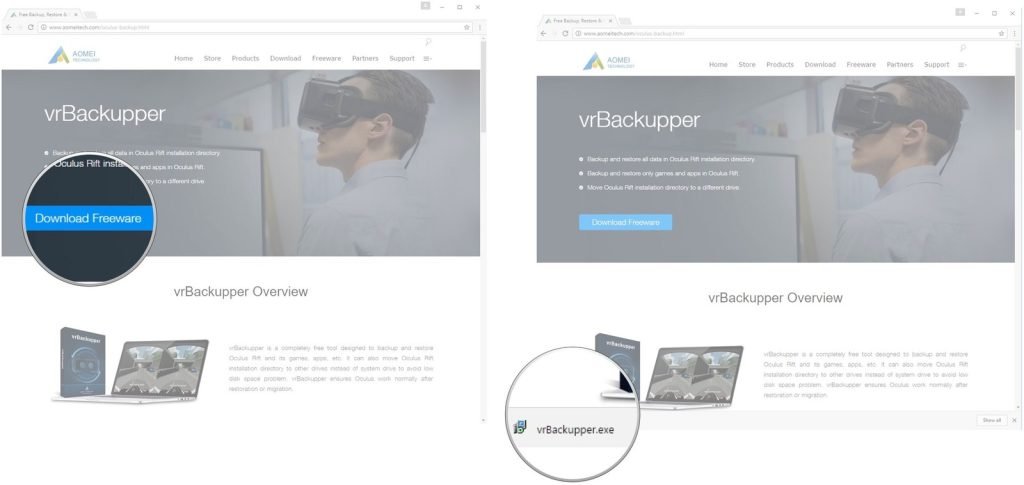
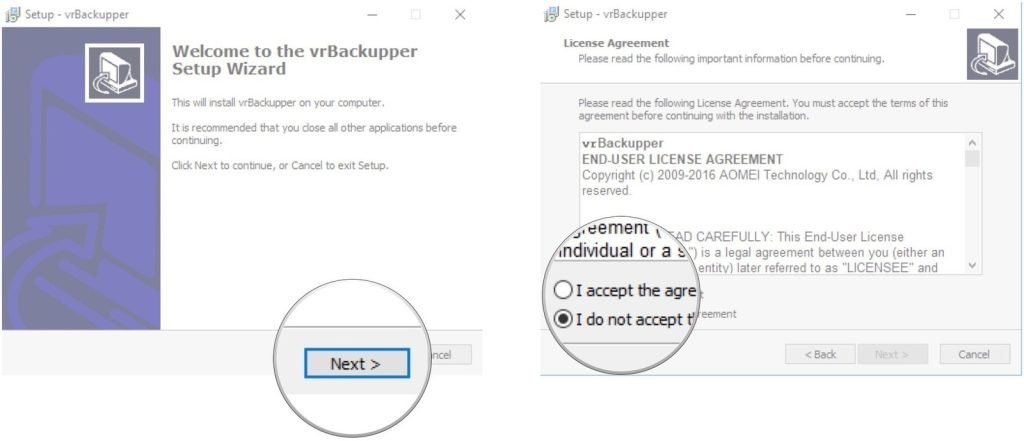
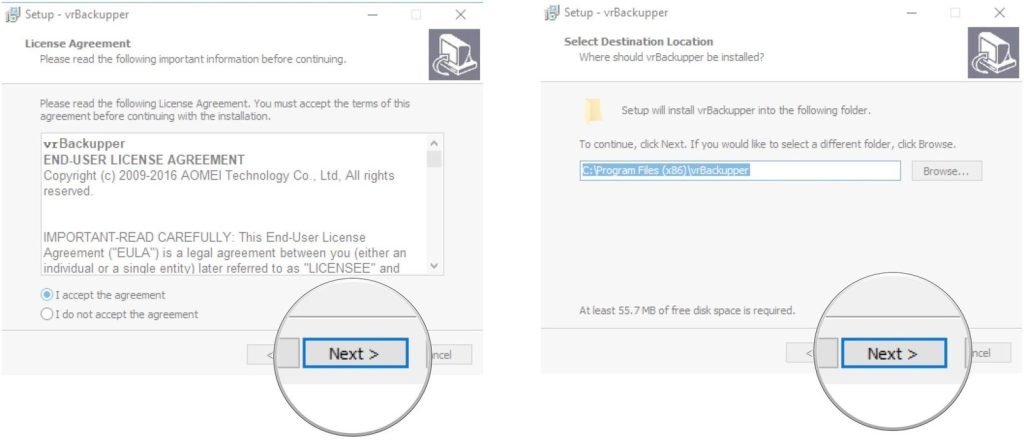
Download and install vrBackupper.
- Go to vrBackupper download page;
- Click Download Free. The download will start;
- Run vrBackupper.exe from the browser’s download bar or File Explorer;
- Click “Next;
- Click “I accept the agreement”;
- Click the Next button 2 times.
- Click the Next button 2 times more.
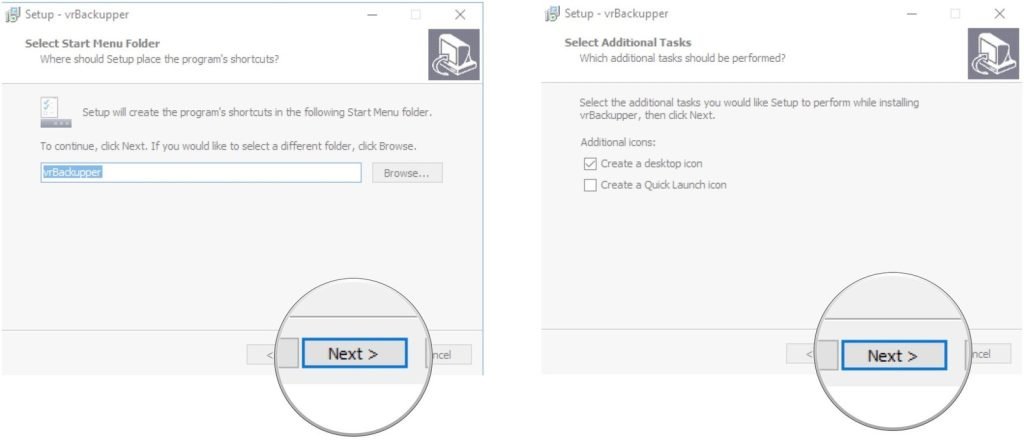
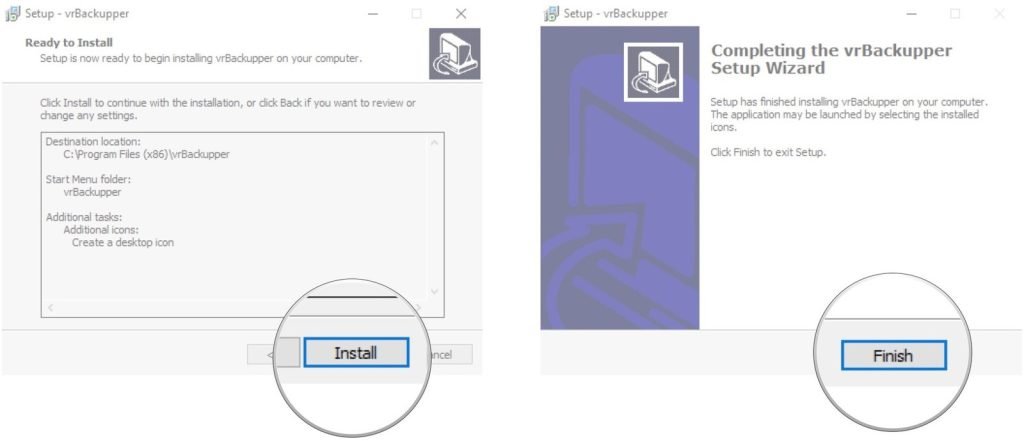
- Click Install;
- Click Done.
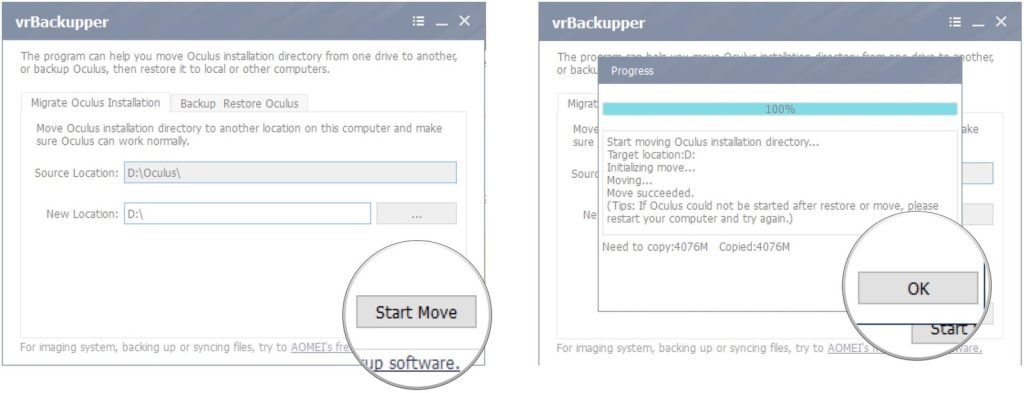
Transfer Oculus and games to another drive using vrBackupper.
Now that the software is installed on your computer, you can begin the process of transferring the Oculus app and games to another drive.
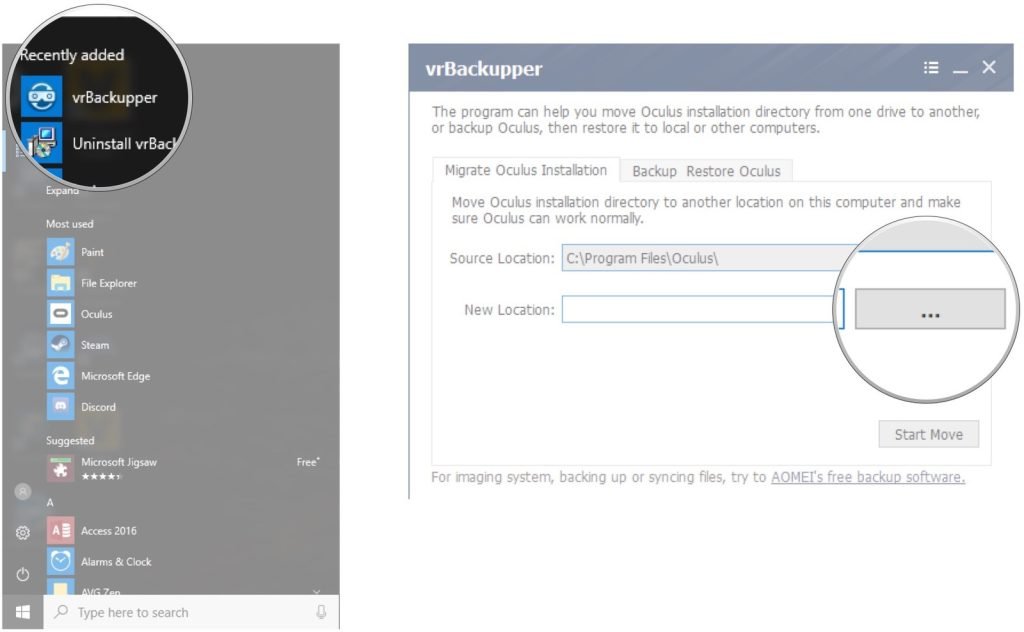
- Launch vrBackupper from the start menu, desktop or taskbar. It will automatically detect where the Oculus app is installed;
- Click the “More” button. It looks like three dots;
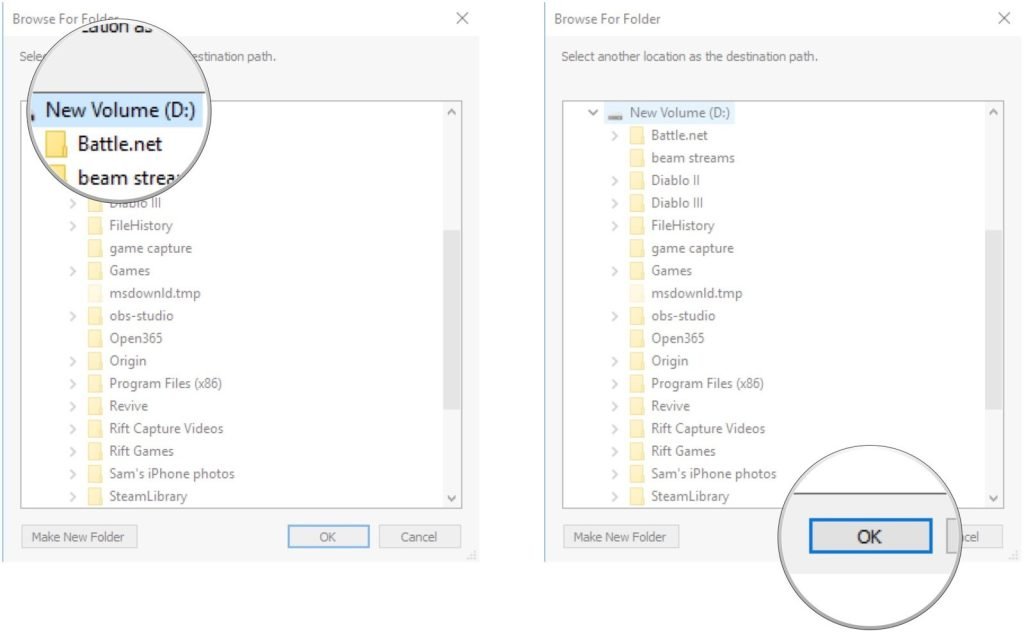
- Choose a new folder to move Oculus to;
- Click OK;
- Click “Start Moving”. Oculus files will be automatically moved to the new location and files on the original drive will be deleted to free up disk space;
- After the transfer is complete, click OK.
Restart your computer and launch the Oculus app. The first time we ran the app after the migration, it closed on its own, but on the second try everything worked as intended.
Have you moved your Oculus library to another drive? What method did you use? Let us know in the comments!