
Table of Contents:
Detailed instructions on how to connect the PlayStation VR headset to a PC using the Trinus VR application.
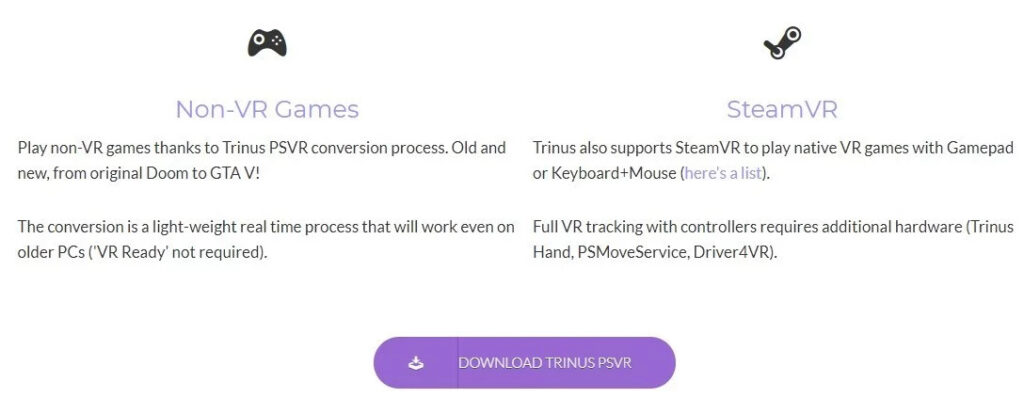
Thanks to the efforts of the developers at Odd Sheep Games, you can connect PSVR to your PC using Trinus VR, software that allows you to use the headset with your personal computer.
For example, you have a large library of games on Steam (VR games or not, it doesn’t matter). You can play them using Trinus VR. In addition, you can watch movies or TV shows in virtual reality mode. We have prepared detailed instructions on how to do this.
What you will need
- Steam Access: Steam Account (Free)
- Access to Steam VR games: SteamVR (free)
- Trinus PSVR Client ($14)
Before you start
Before we begin, it is important to note two things:
- There is a free trial version of Trinus PSVR, which has time limits. Before you buy the program for $14, you can make sure it works and download it for free here
- If you are satisfied with everything, then you can buy the full-featured version.
With this purchase you will support the continued development of Trinus PSVR. But the developers themselves still recommend trying the software before purchasing it. At the moment, there has not been a single PlayStation 4 software update that would in any way prevent the program from working.
How to install Trinus PSVR on your computer
First of all, you need to configure the Trinus PSVR.
1. Launch your favorite web browser from the Start menu, taskbar, or desktop.
2. Go to trinusvirtualreality.com/psvr/
3. Click Download.
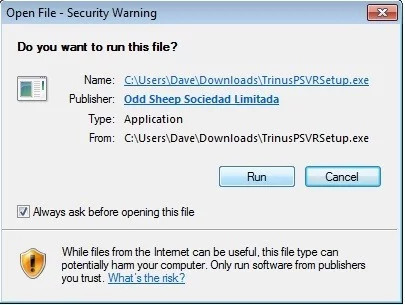
4. Click “Run” when the file is completely downloaded. You may have to agree to run as administrator.
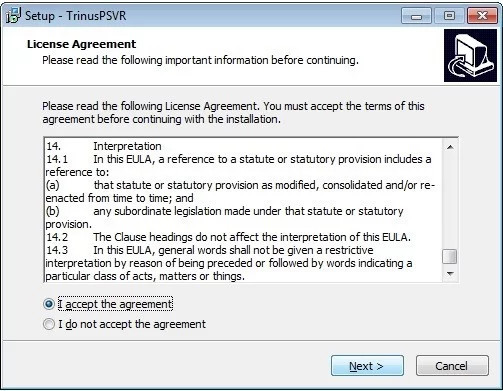
5. Click I accept the agreement.
6. Click Next.
7. Click Next after selecting the folder where you want to upload the file.
8. Click Next after deciding whether to create a program shortcut in the menu.
9. Click Next after you decide whether to create a desktop shortcut or not.
10. Click Install.
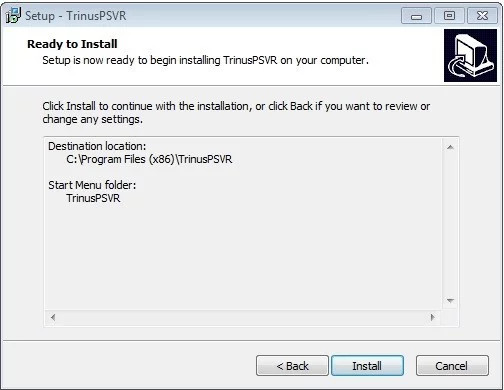
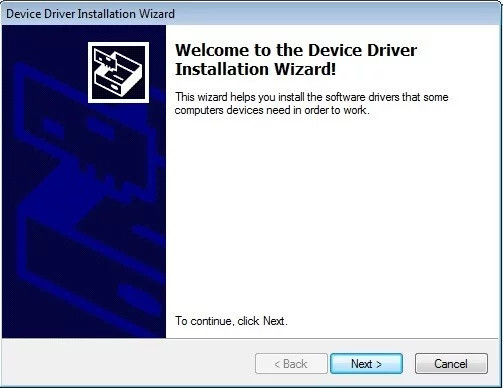
Once the installation is complete, the driver installation window will open.
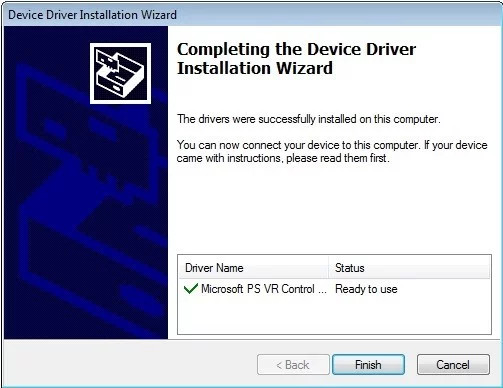
11. Click Next.
12. Click Finish.
Now that you have Trinus PSVR installed on your computer, you can move on to setting up your PSVR.
How to set up PSVR to use Trinus PSVR
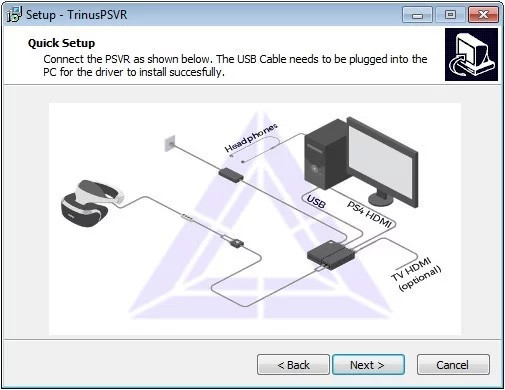
Before you can start playing games, you need to make a wired connection between PS4 and PC:
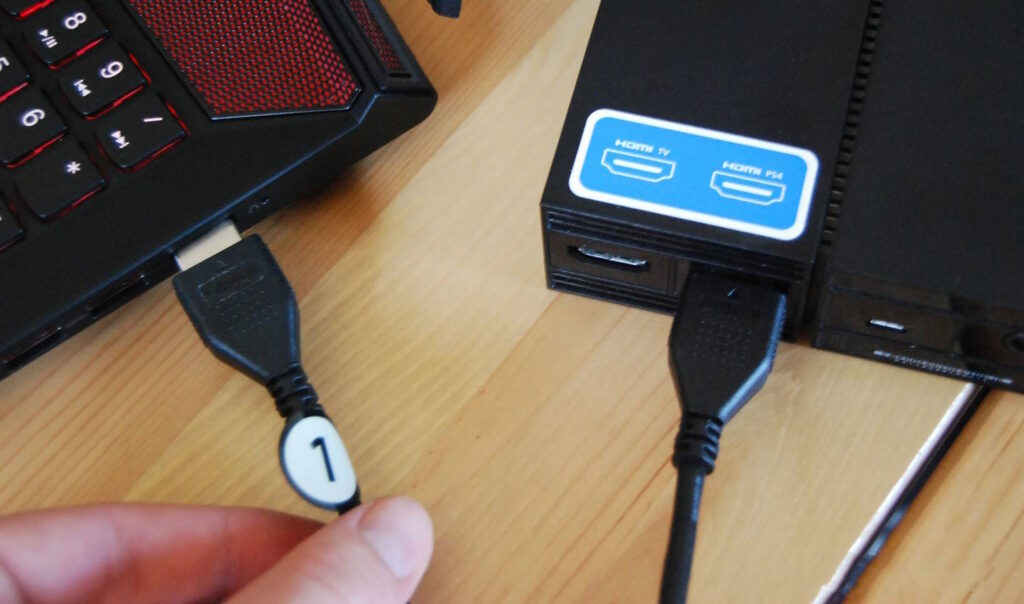
1. Connect the HDMI cable to the PS4 HDMI port.
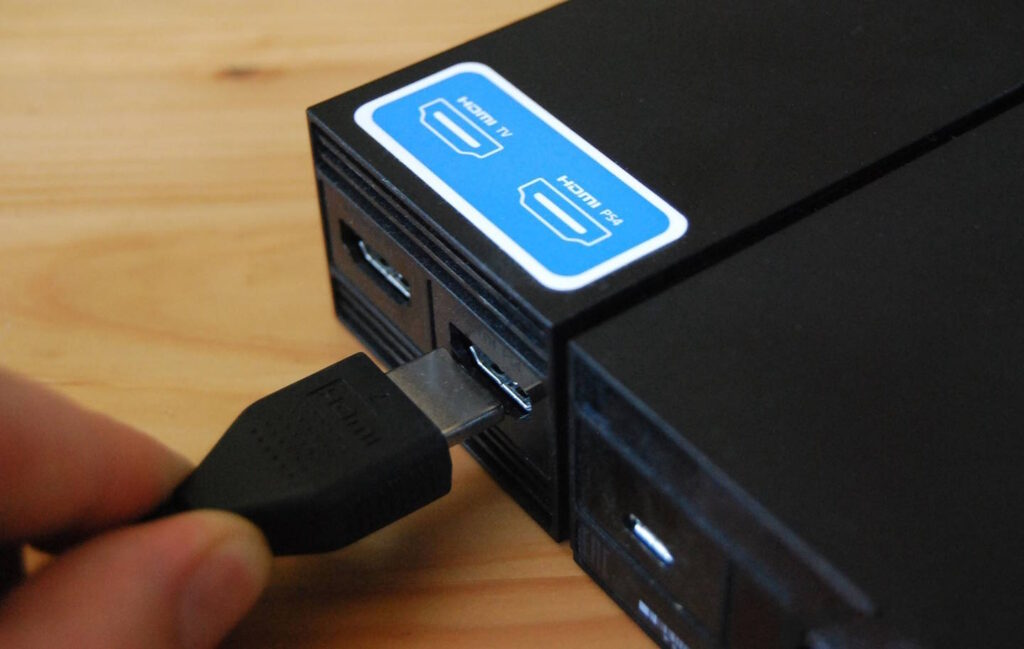
2. Connect the other end of the HDMI cable to the HDMI port on your computer.
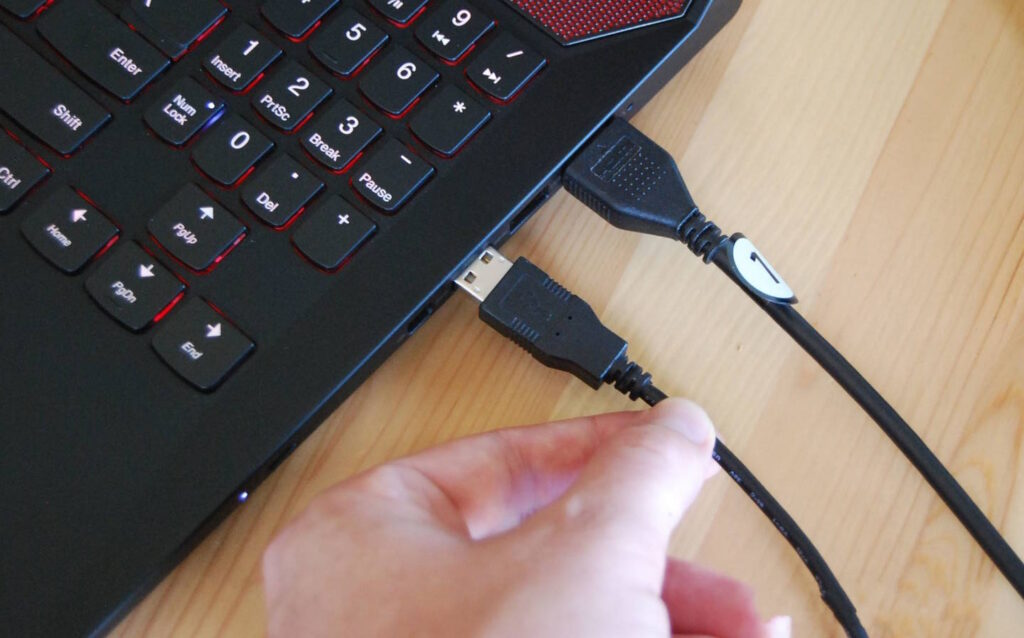
3. Plug the USB to Micro-USB cable into the PS4 connector.
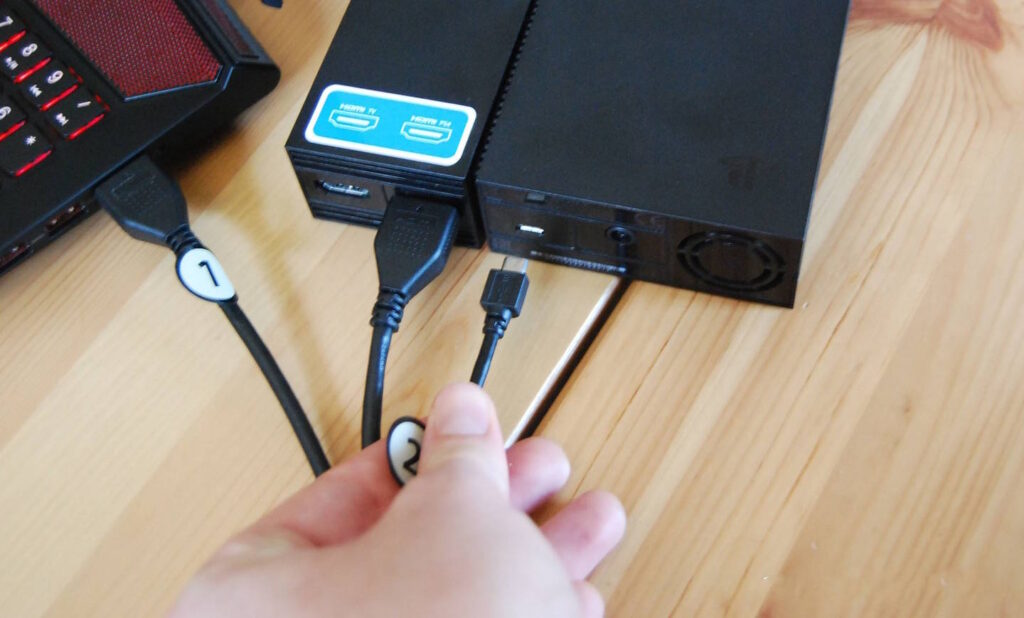
4. Connect the other end of the USB to Micro-USB cable to a USB port on your PC. For best performance, you need to use the USB 3.0 standard – both connector and cable.
5. Connect the headset to the PSVR unit.
6. Connect the PSVR unit to power and turn on the remote control.
Setting up Trinus PSVR
Now that your PSVR is connected to your PC and Trinus PSVR is downloaded and installed, you can fire it up and get started. Before you begin these steps, make sure your PSVR is placed on a level, flat surface.
Step-by-step instruction:
- Run Trinus PSVR as administrator.
- Click the Install button.
- Trinus should automatically find your Steam folder.
- Go to the “Main” tab.
- Click the drop-down arrow next to the PSVR display and click DISPLAY1.
- Click the drop-down menu next to PSVR mode.
- Select VR. Additionally, you can choose Cinematic if you want to watch a movie or play a regular 2D game in virtual reality.
- Click the Assign Key button.
- Press a key on your PC keyboard to assign it to switch views in PSVR.
- Check the Use Mouse Wheel box to be able to use the mouse wheel to zoom while playing.
- Next, you need to press the Start button, after which calibration will begin, so it is important that the headset is placed on a flat, flat surface.
- Launch Steam as administrator.
- On Steam, select and launch VR and then click “Start Room Setup” in the drop-down menu.
- Once configured, click Next.
- Press Windows + Shift + Right Arrow keys on your keyboard to transfer the image to PSVR. Now, if you put on the PSVR, you can see everything exactly the same as if you were using the Rift or Vive.
You can now launch a SteamVR game and enjoy it on PSVR. To make your keyboard, mouse, or controller work in game, use the Alt+Tab key combination on your keyboard. This combination will open the settings window on your computer monitor.
Mouse mode
If you want to play all your Steam games using PSVR, you can do so in mouse mode. Some games, like Crysis 3 and Doom 3, have built-in parallel support that allows you to play them in VR. However, most games do not have this support, so you will have to use VorpX.
To play regular games you need to switch to Cinematic mode. In this mode you can use a mouse and PSVR:
- Go to the “Main” tab at the top of the Trinus PSVR window.
- Click the drop-down arrow.
- Select Mouse
- Click the drop-down arrow next to Non-VR.
- Click None or, if the game you are playing is known to have parallel support, Side by Side.
- Click the drop-down arrow next to PSVR mode.
- Select Cinematic.
- Click Start.
- Launch a Steam game that doesn’t support VR.
To transfer the image to the headset screen, press on your Windows PC keyboard + Shift + right arrow.
Possible problems
Trinus PSVR is still under development and bugs may occasionally occur. In order to avoid them, before pressing Start for the first time for calibration, you need to thoroughly make sure that the headset is on a flat and stable surface and directed in the direction where you will be looking during the game.
Just wish to say your article is as surprising The clearness in your post is just cool and i could assume youre an expert on this subject Fine with your permission allow me to grab your RSS feed to keep updated with forthcoming post Thanks a million and please keep up the enjoyable work
Hi my family member I want to say that this post is awesome nice written and come with approximately all significant infos I would like to peer extra posts like this