Table of Contents:
Explore apps and settings tailored for Skyrim VR. Dive into our guide to optimize performance and elevate your VR gaming experience.
Hey there, fellow VR enthusiast! If you’re diving into the world of Skyrim VR, you’re in for a treat. But, as with any game, performance can make or break your experience. Let’s chat about how to get the most out of your Skyrim VR experience, shall we?
1. The Basics: Render Resolution
Starting off, it’s a good idea to play the game at a render resolution of 100% on SteamVR or 1.0 on Oculus. If you’re feeling adventurous and have an Oculus Quest, you might want to dial it down to 0.7 for optimal performance.
2. Keeping an Eye on Performance
Wondering how your game’s doing? There are a few tools to help you out:
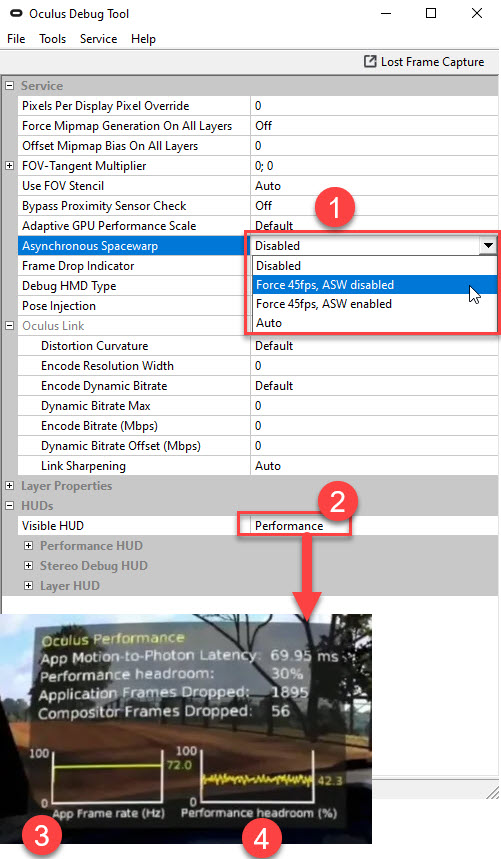
- Oculus (Meta) Device Users: Open the debug tool and select “Performance” from the HUD Display dropdown. This will show you an FPS and headroom counter.
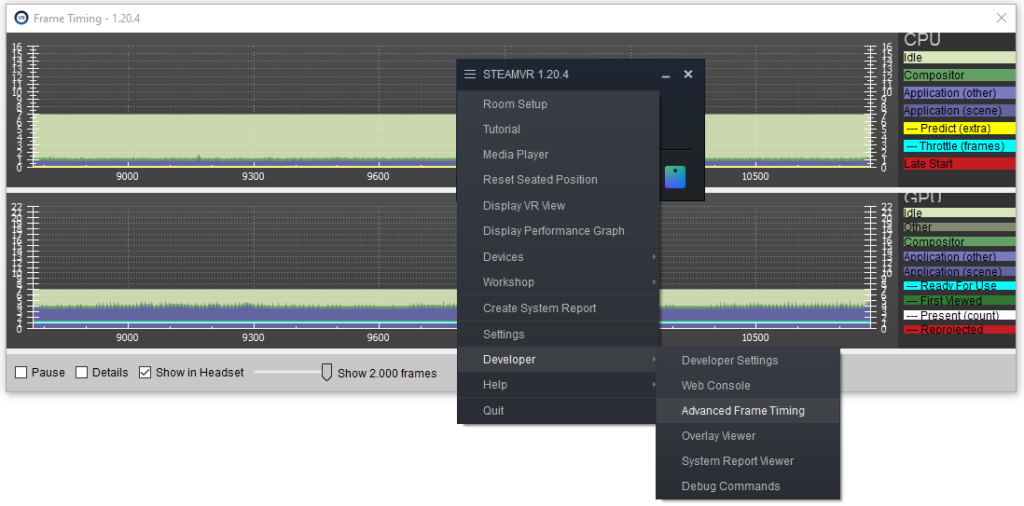
- SteamVR Users: You can use tools like fpsVR or the native SteamVR Advanced Frametimer.

These tools give insights into your GPU’s workload during gameplay.
3. Decoding the Numbers
You’ll notice frame times for both CPU and GPU. This represents the time taken for these components to generate the next image for your VR display. For smooth gameplay on an HTC Vive, for instance, you’d want this time to be below 11.1 ms (1/90 Hz). If you’re using a Valve Index set to 144 Hz with forced reprojection, aim for below 13.8 ms.
4. Quest Users: Dive into the Oculus Debug Tool

ASW (Asynchronous SpaceWarp) can be your best friend. It lets you cap the refresh rate or add reprojection. If you’re experiencing inconsistent frame rates, consider using ASW to stabilize things. The “Force 45 FPS, ASW Disabled” option caps your FPS at half your headset’s refresh rate. So, for a Quest1 with a 72 Hz refresh rate, you’ll be capped at 36 FPS. The “Force 45 FPS, ASW Enabled” option adds a motion-smoothing effect. Some love it, some don’t. Read more about ASW here.
5. Adjusting Performance
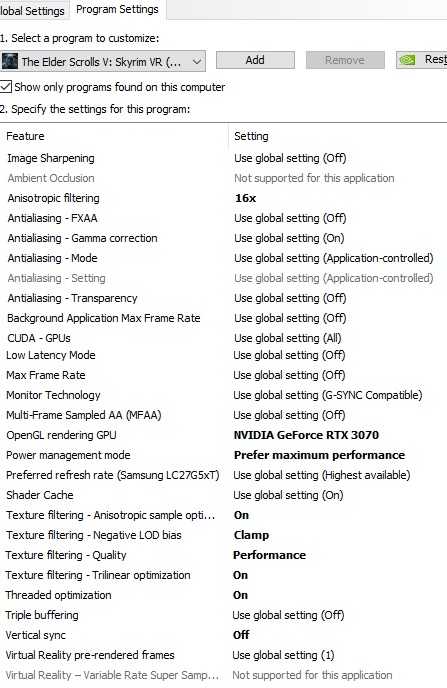
Nvidia Control Panel Settings
For those with Nvidia GPUs, there are some recommended settings to optimize performance.

Windows Tweaks
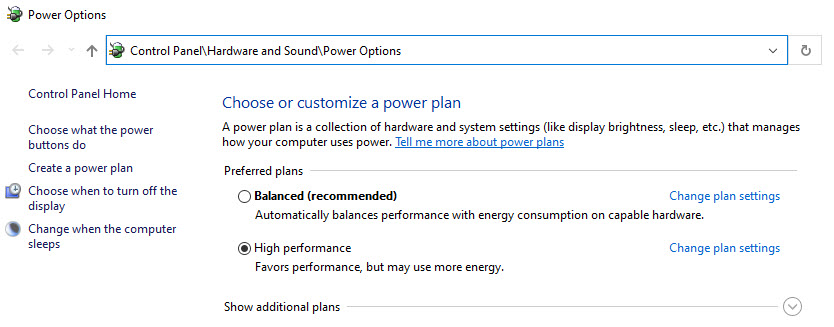
- Ensure your PC is in performance mode.

- If you have less than 32GB RAM, consider setting your Windows page file to 20GB.
6. Other Performance Boosters
- Fixed Foveated Rendering (FFR): This can enhance performance, though it might introduce a slight flicker at the edges. Adjust settings in the Skyrim VR base game folder. More on FFR here.
- Reshade/ENB Presets: These can enhance visuals. Light options like
The Sharper Eyehave minimal performance impact. Explore more presets here. - INI Files: Adjust these for performance. By default, the “Low” preset is selected, but you can experiment with other presets.
7. A Note on Oculus Quest and Other Oculus (Meta) Devices
For a significant performance boost, consider using “OpenComposite“. This can improve performance by 10-20%. However, it’s not compatible with certain apps and tools.
8. SuperSampling
This setting adjusts render resolution. If the game looks blurry, increase this value. If you’re experiencing lags, reduce it. For Quest users, adjust the SS in the opencomposite.ini file. For non-Quest users, adjust the SS in SteamVR.
9. INI Settings that Might Slow You Down
Certain settings can be adjusted in the “INI Configuration Tool” in MO2 to optimize performance. For instance, bEnableTreeAnimations can be set to 1 for tree animations, but this might reduce performance.
And there you have it! A friendly chat on optimizing your Skyrim VR experience. Dive in, and may your adventures be smooth and immersive!

