
Before you can play Oculus Quest after purchase, you will need to set it up first. This will take several minutes.
The Oculus Quest is the coolest virtual reality headset on the market right now, delivering an amazing VR experience that anyone can enjoy. But before you can show your Beat Saber score to friends, you’ll need to set it up. It will take a few minutes and then you can play.
How to set up your Oculus Quest:
- Open the Oculus Quest box and remove the headset.
- Remove the Oculus controllers from the box.
- Carefully remove the battery cover from the controllers.
- Insert the batteries from the box.
- Close the battery cover.
- Download the Oculus app to your phone.
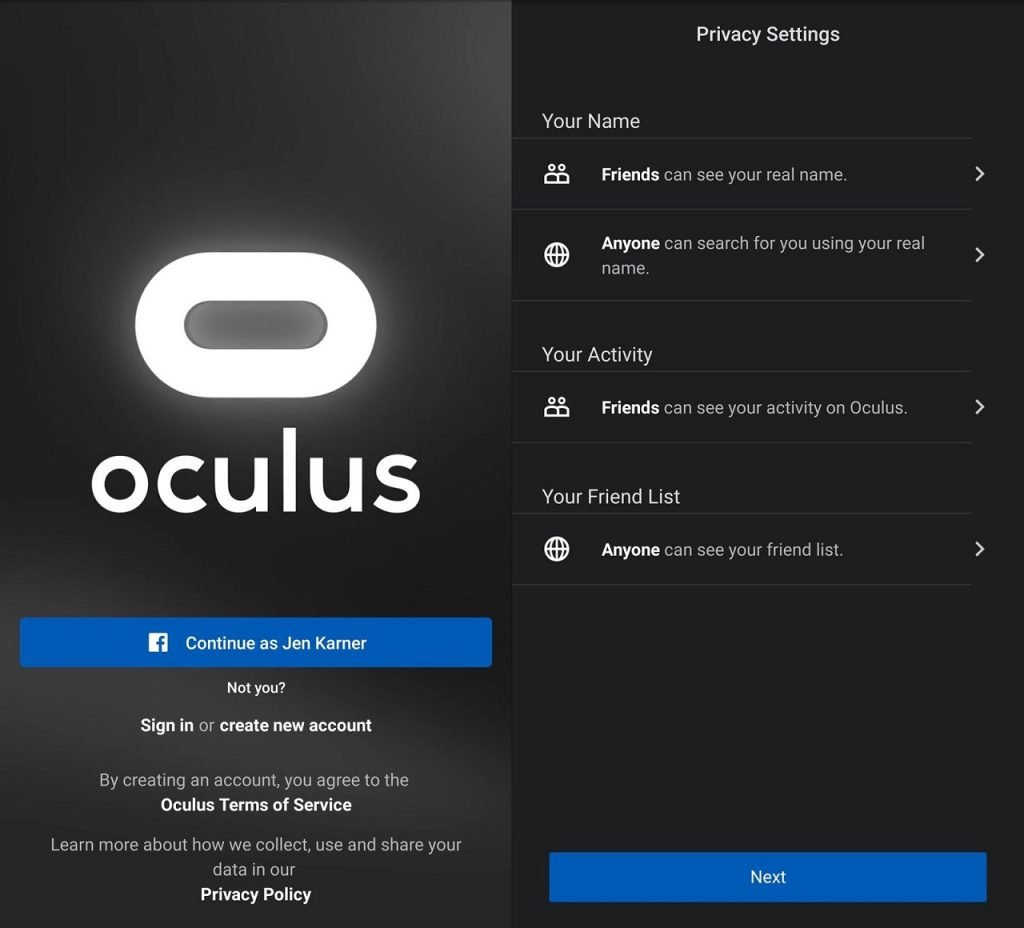
- Sign in to Oculus. You can create an account, use your Facebook or log into an existing account.
- Click Accept to accept the updated Oculus Privacy Policy and Terms of Service.
- Change your privacy settings and click Next. You can skip this step and come back to it later.
- Add a payment method for Oculus games. You can always come back to this later.
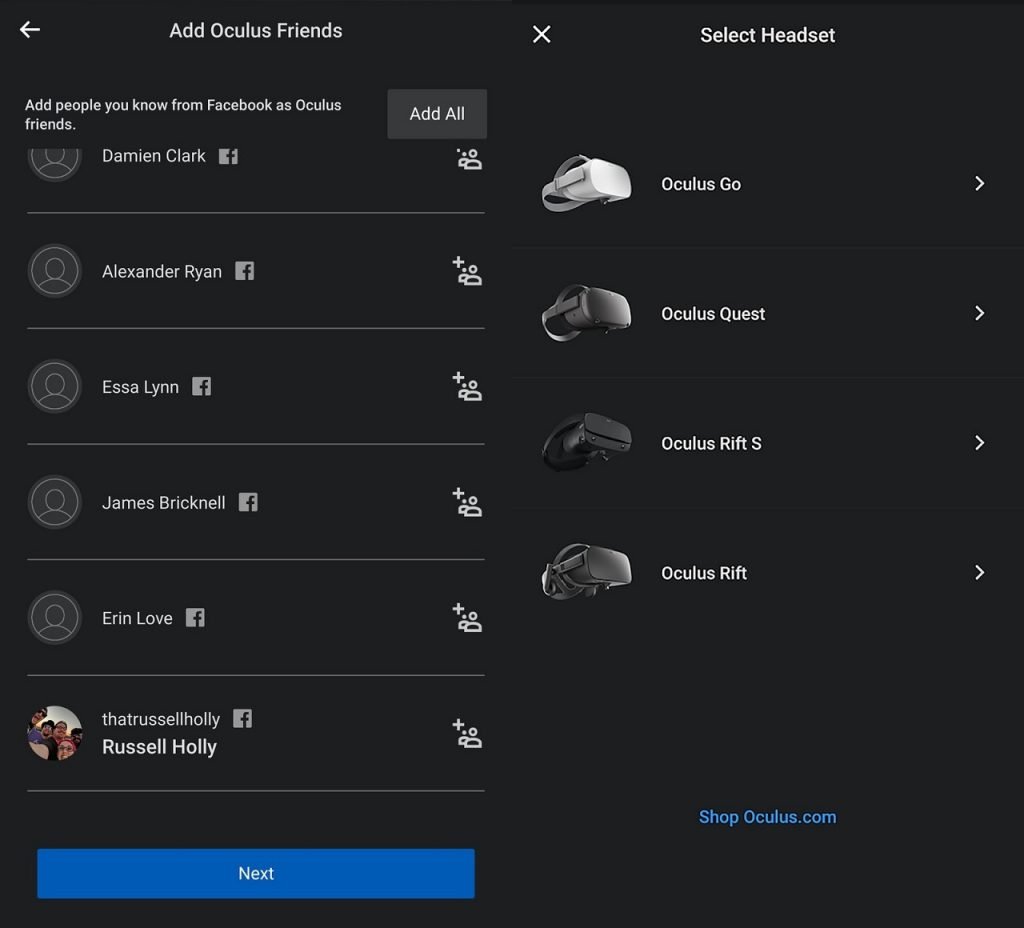
- From the headset menu, select Oculus Quest.
- Take the charger out of the box.
- Pull the tabs on the divider to release the charger.
- Connect the charger and connect it to the charging port. It’s the USB-C connection on the left side of the Quest.
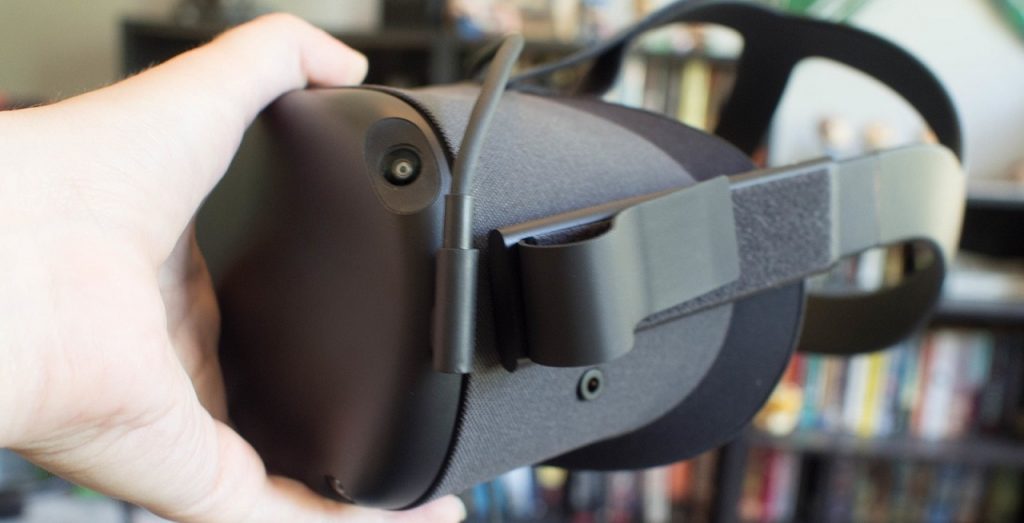
- You will see a colored indicator on the right side when the headset is connected.
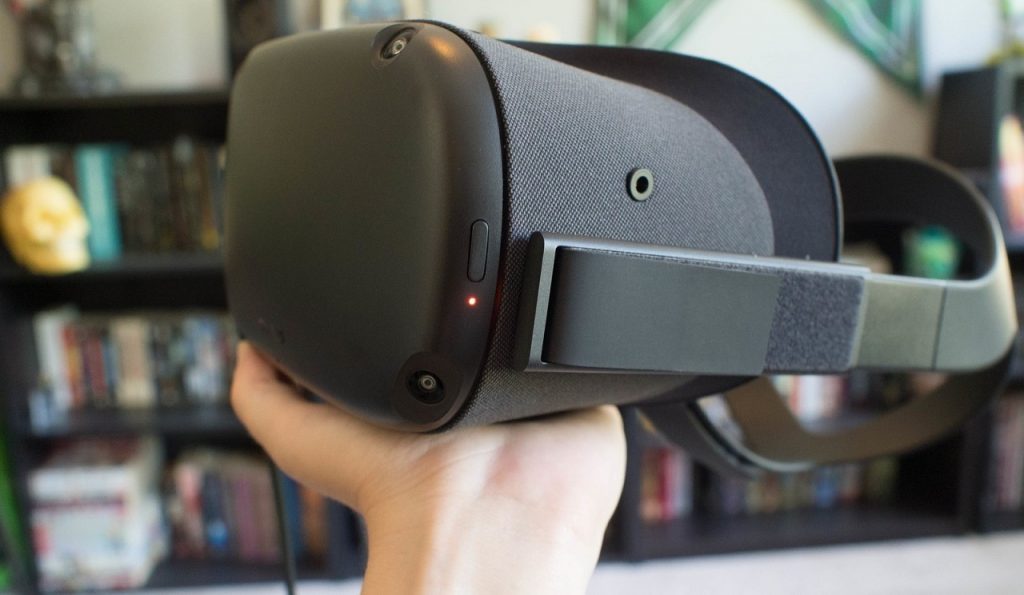
- Turn on your Oculus Quest by pressing and holding the power button for two seconds. The power button is on the right side of the headset, next to the indicator light.
- Turn on Bluetooth on your phone and put on the headset.
- Enter the 5-digit number displayed inside the headset to pair it with your phone. It will be displayed in the lower right corner.
- Remove the headset. Select the Wi-Fi network you want to connect to.
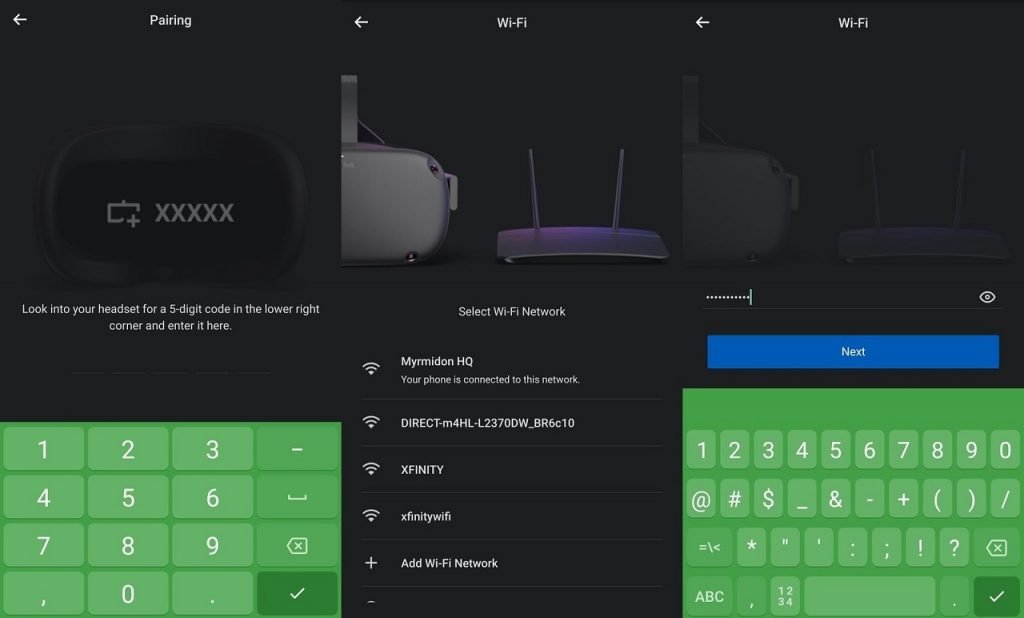
- Enter your Wi-Fi password.
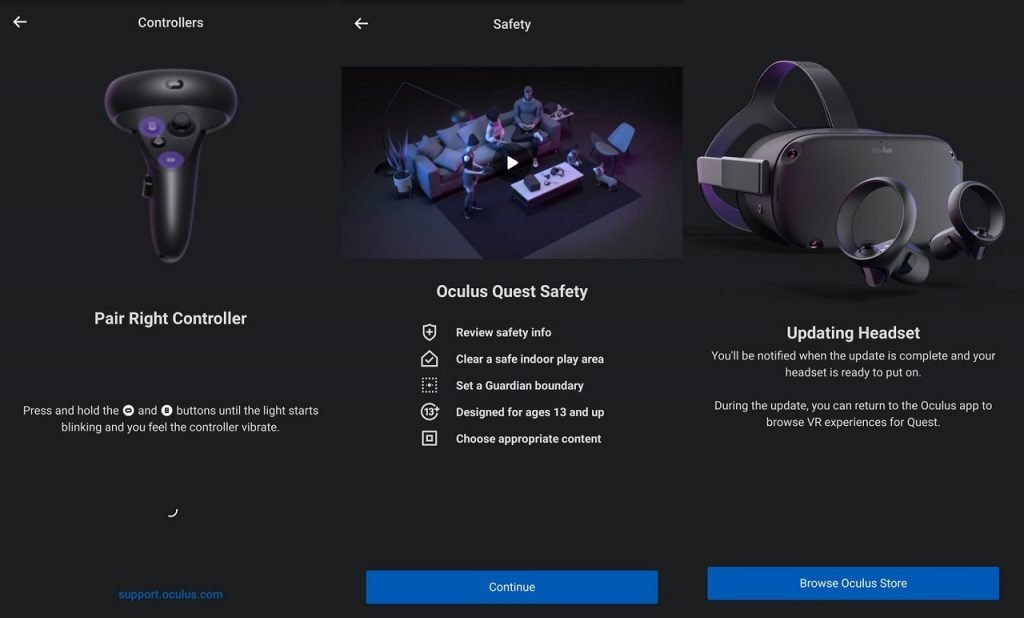
- Follow the instructions in the Oculus app to pair your controllers.
- Select the language you want to play in and click Continue.
- Watch the video in the Oculus app.
- Wait for the headset to update.
- Put on your headphones and use your Oculus controllers to set boundaries for your play area.
- Complete the Oculus tutorial and you’re done!
Getting your Oculus Quest headset ready takes a few minutes. Luckily, the Oculus app will guide you through the process. All of the above should not take you more than 15-30 minutes.
Just remember that you will need to mark the boundaries of your play areas in order to allow the Guardian tracking system to work. You can take your Oculus with you wherever you go and easily share VR with friends and family.